Creating Logo Illustrations with MidJourney: A Step-by-Step Guide
Andy Orsow
YouTube Content Creator
Overview
Learn how to transform a simple logo into creative illustrations using MidJourney. This tutorial covers uploading images, using the retexture tab, experimenting with prompts, iterating on designs, and applying personalization to enhance results.
Premium Tutorial
This tutorial is available exclusively to paid subscribers. Sign up for premium access to unlock the full content.
Become a MemberTutorial Content
Step-by-Step Tutorial
Introduction
In this tutorial, you will learn how to create logo illustrations using Midjourney, starting from a basic logo image. We'll guide you through the process of uploading your logo, experimenting with different prompts to generate unique textures and effects, and using Midjourney's personalization feature to enhance your results. By the end, you'll have a set of creative logo variations suitable for a no-code website builder like Framer.
Prerequisites
- Basic understanding of image editing concepts
- Access to a logo image (either a flat image or a 3D render from Cinema 4D)
- A Midjourney account with access to the website interface
- A computer with internet access
Steps
Step 1: Prepare Your Logo Image
Start by selecting the logo you want to work with. If you have a 3D render from Cinema 4D, use that. Otherwise, a flat image of your logo will work just as well. Ensure the image is clear and high-resolution for the best results.
Notes:
- If using a 3D render, make sure it's exported in a common image format like PNG or JPEG.
- For flat images, ensure the logo is isolated on a plain background for easier manipulation.
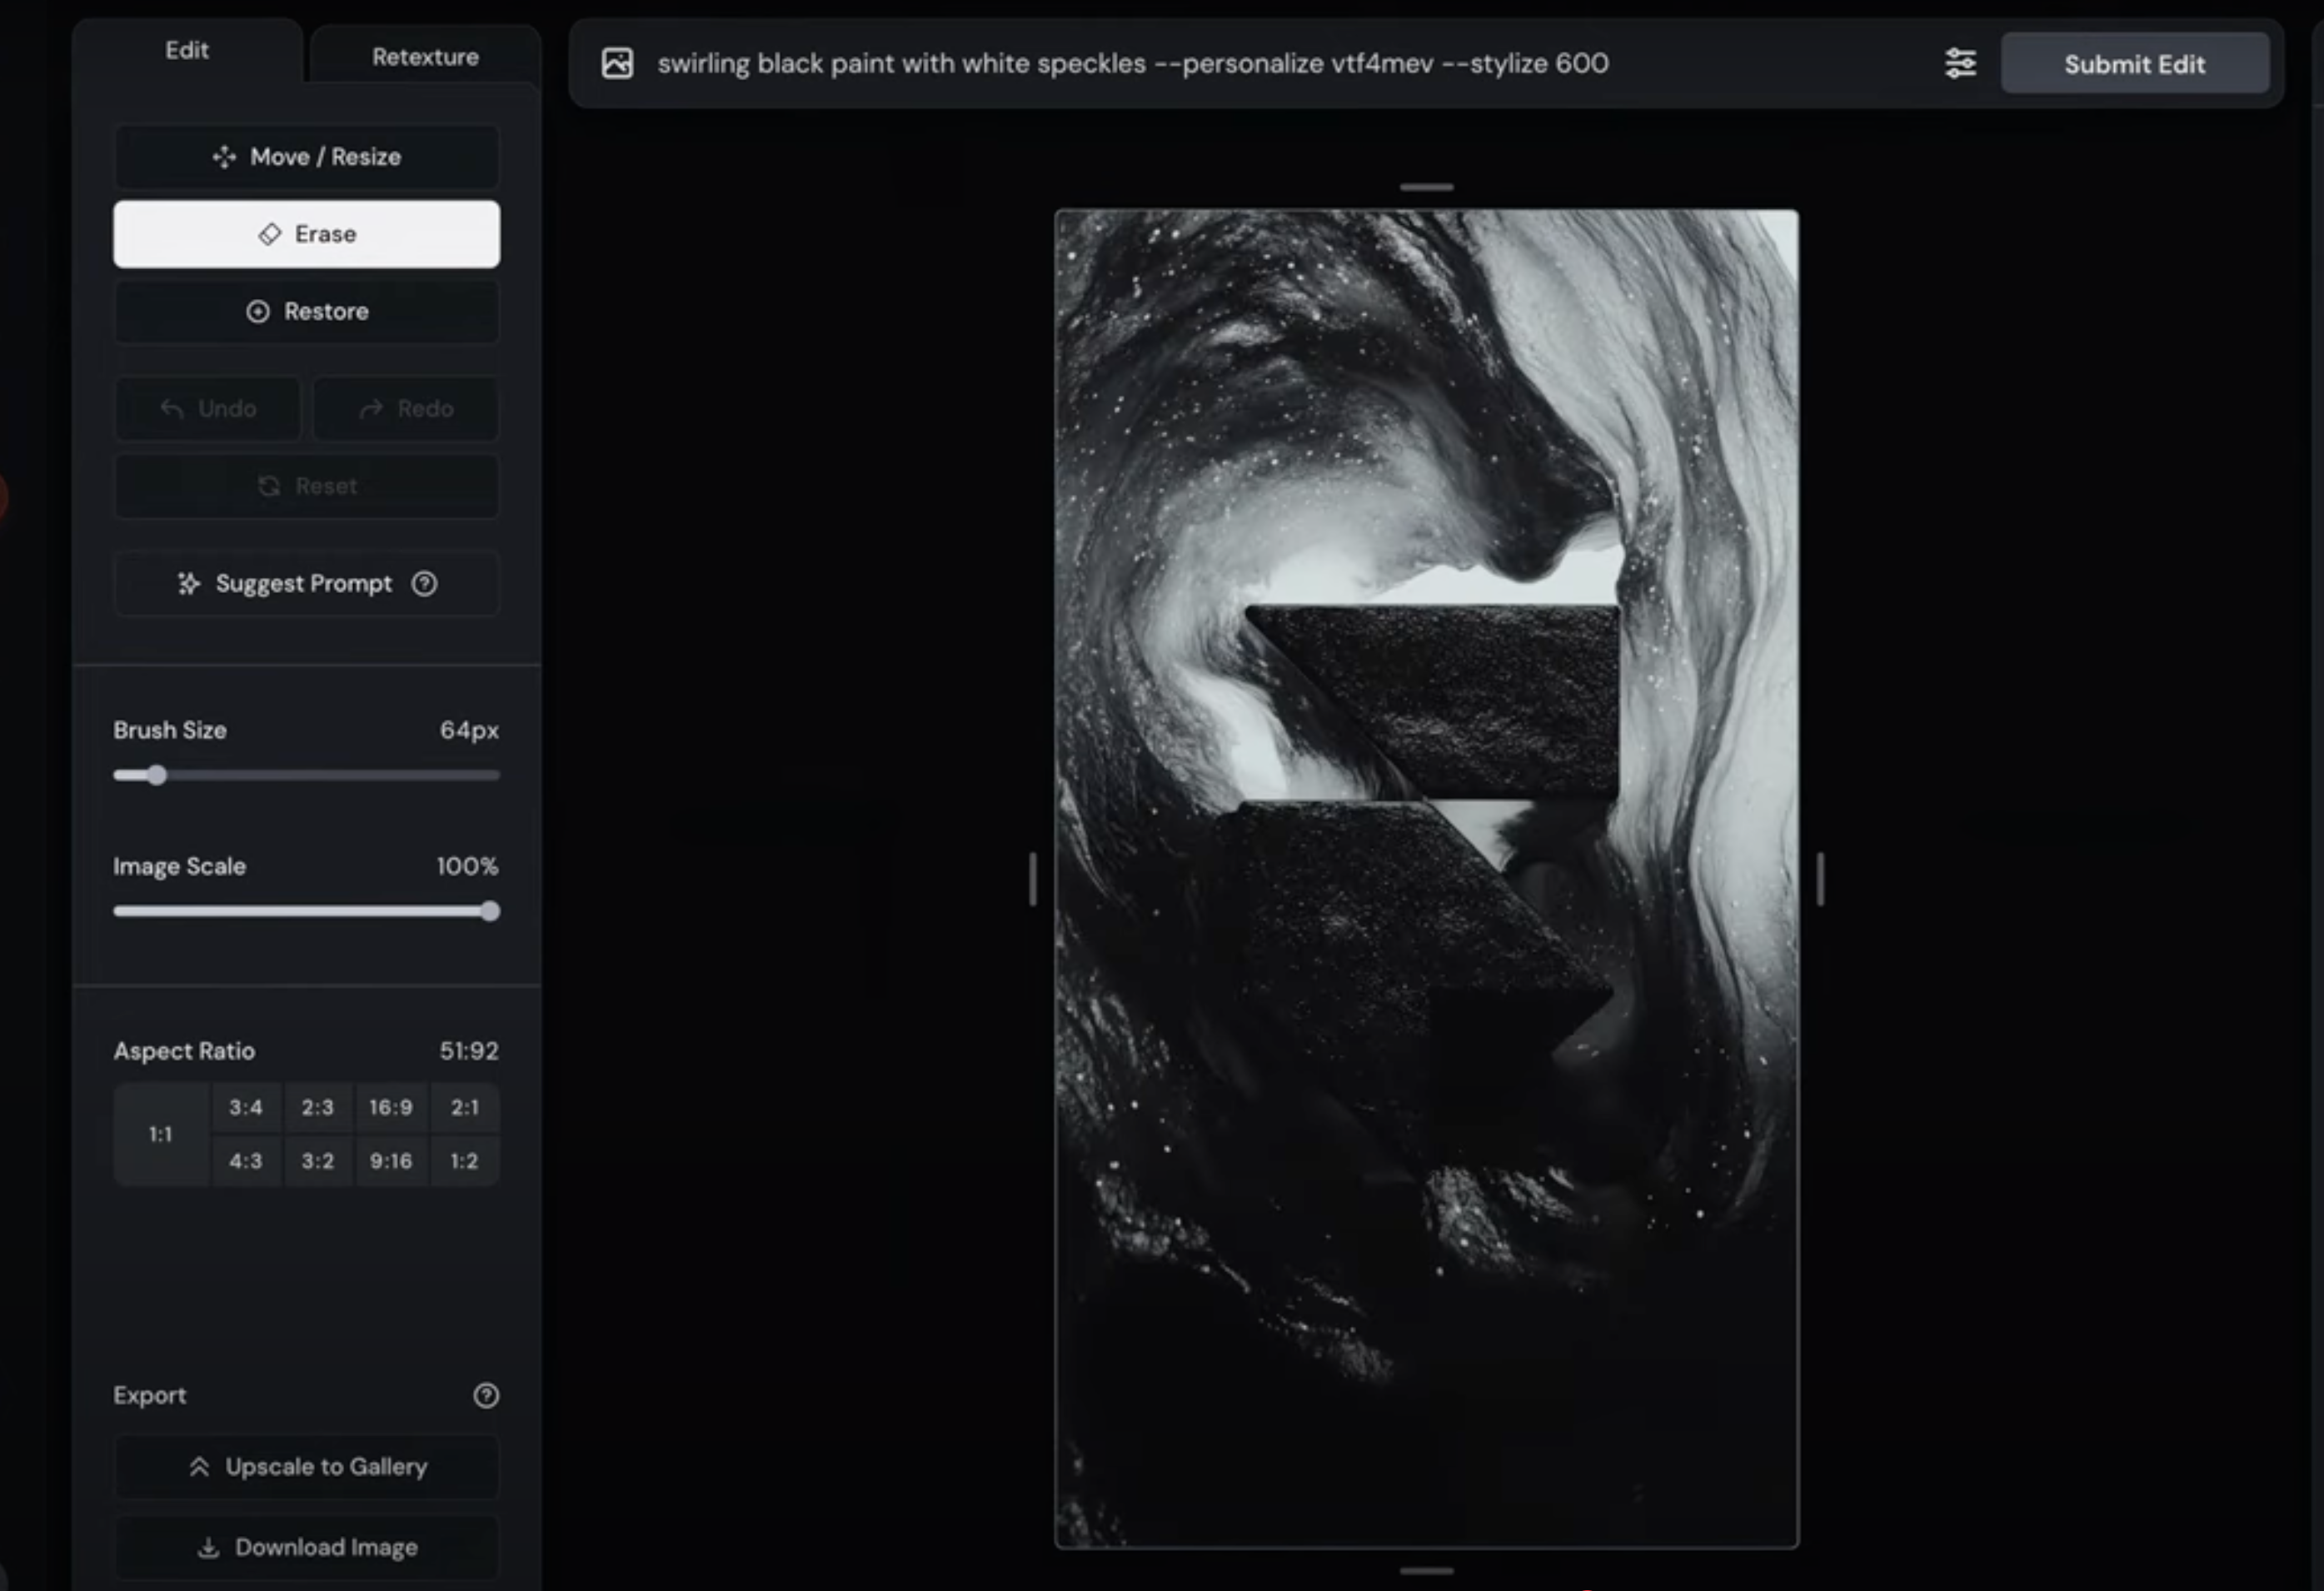
Step 2: Upload Your Logo to Midjourney
Navigate to the Midjourney website and log in to your account. Go to the 'Edit' tab and click on 'Upload Image'. Select your logo image from your computer and upload it to Midjourney.
Notes:
- Make sure you're using the website interface, not the Discord bot, as mentioned in the tutorial.
Step 3: Experiment with Retexture Prompts
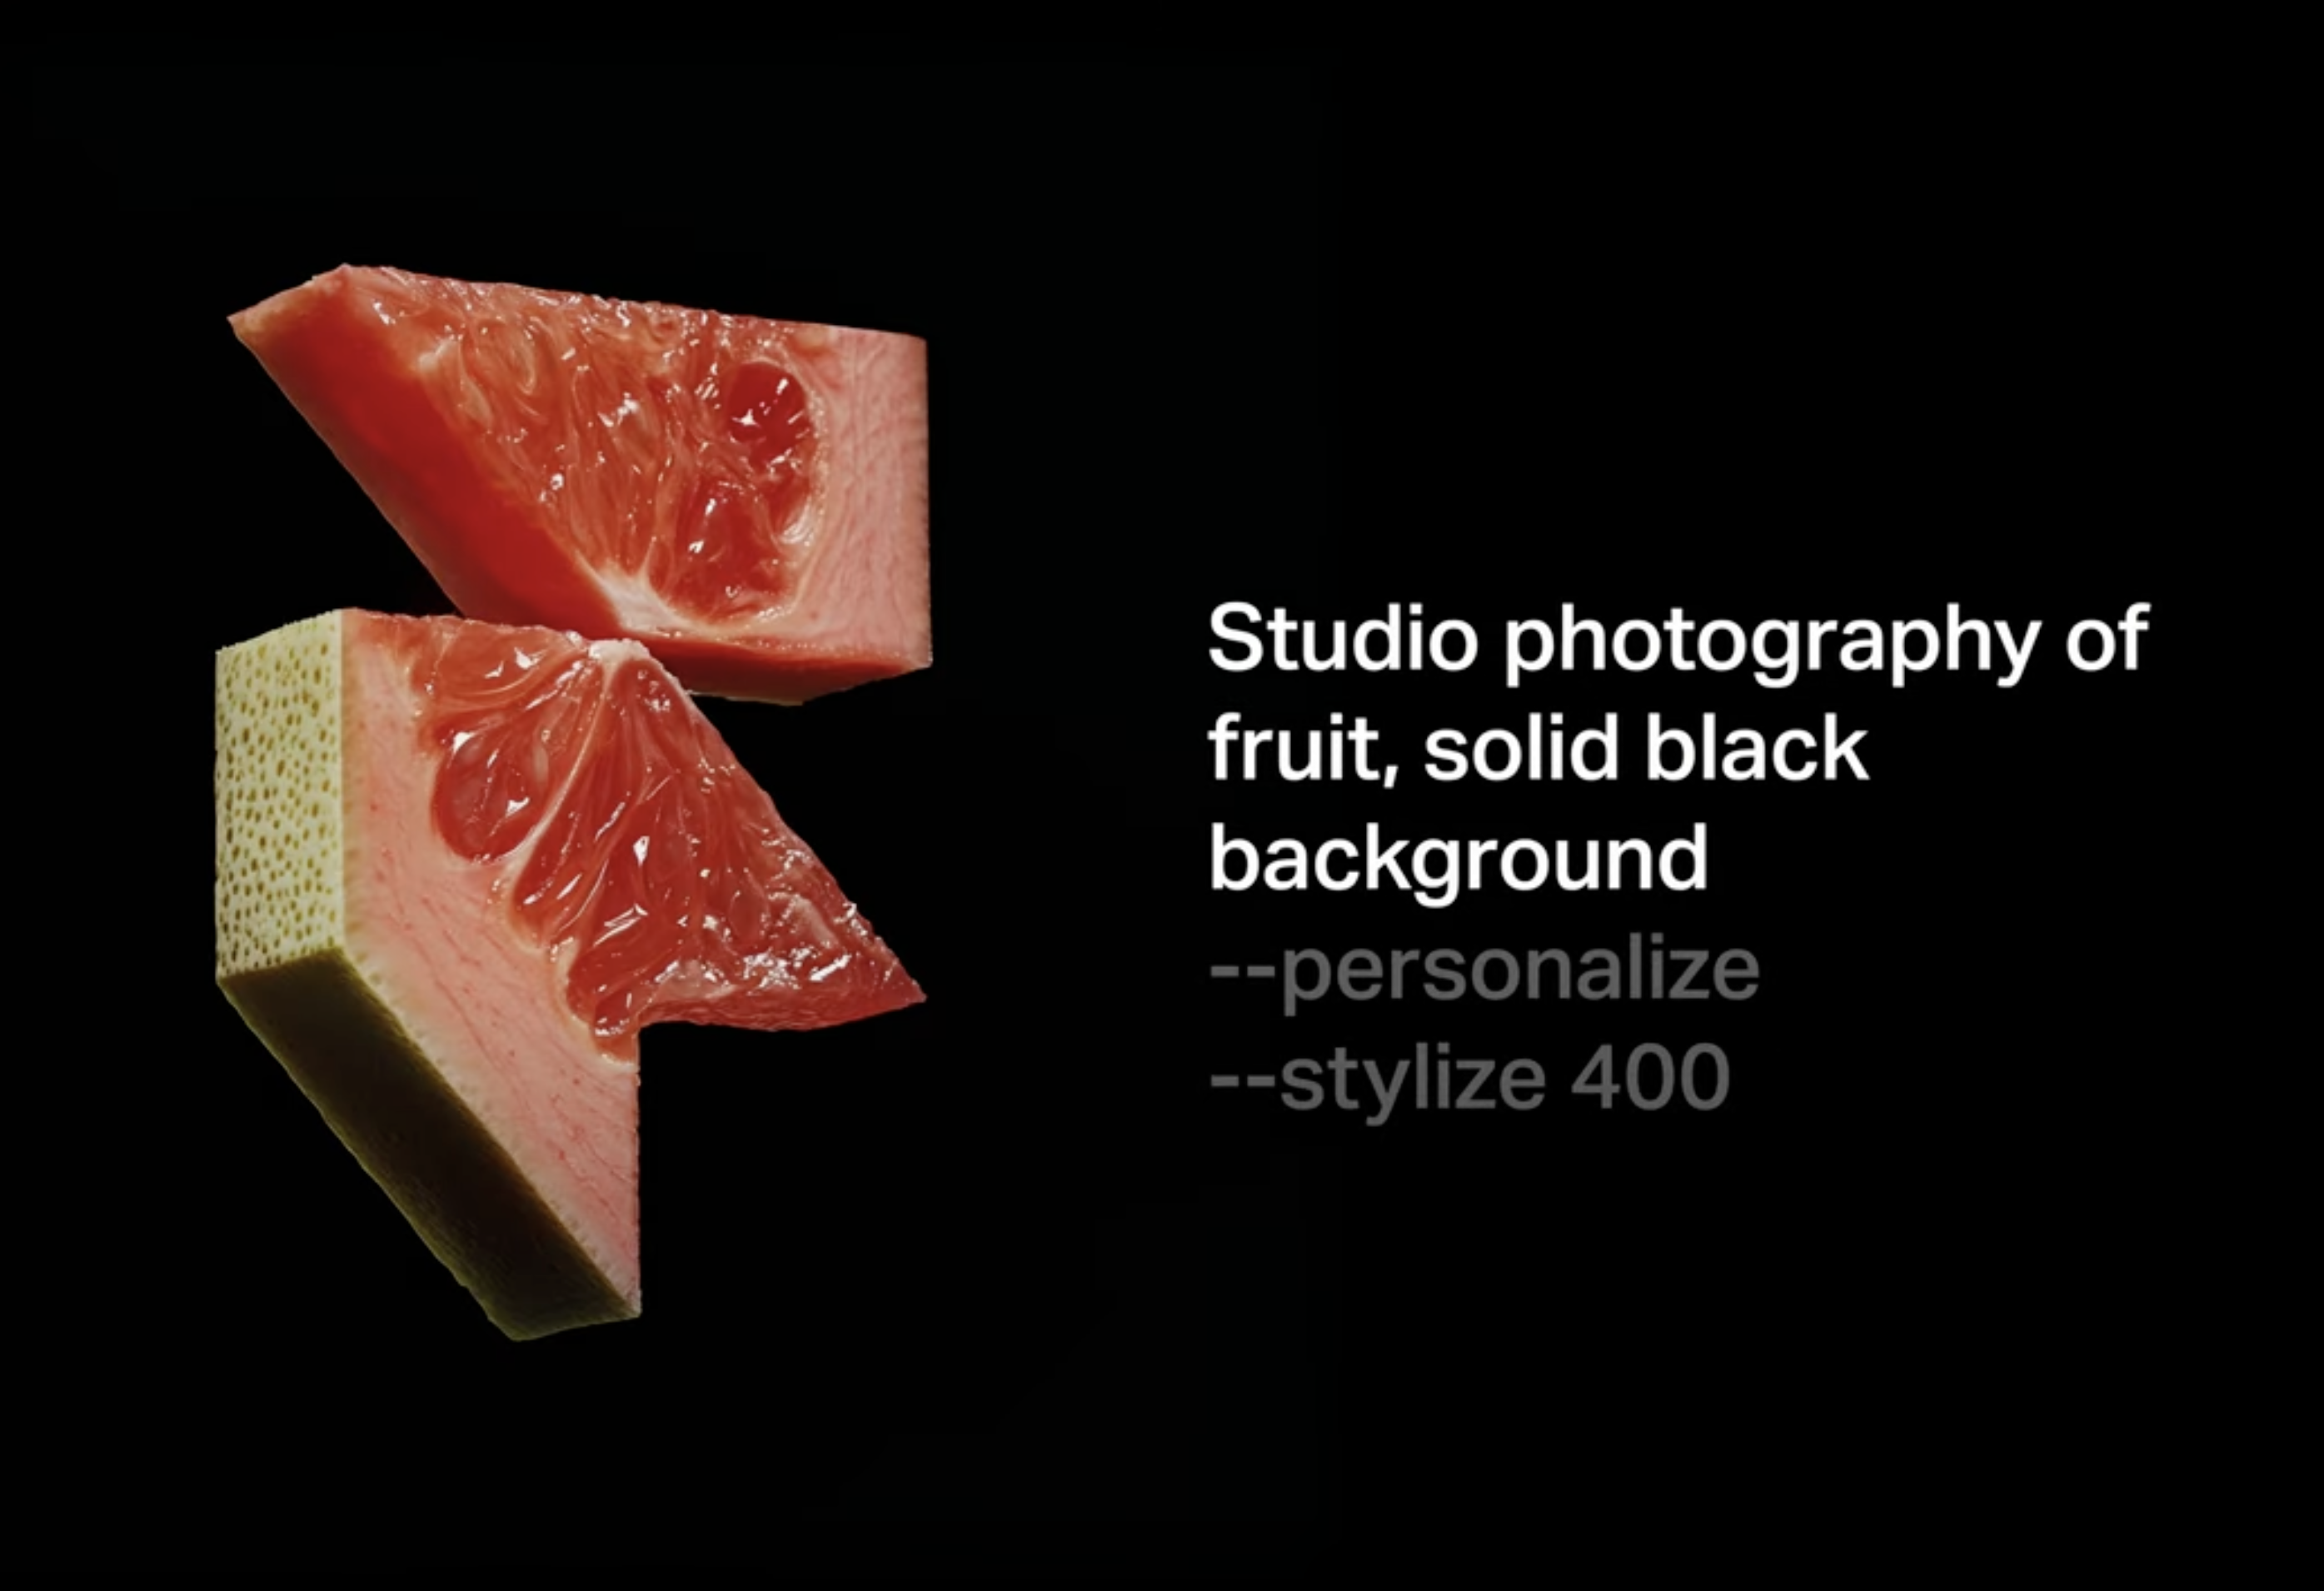
Once your logo is uploaded, navigate to the 'Retexture' tab. Here, you can start experimenting with different prompts to generate unique textures and effects. Try prompts like 'macro photography of ice, black background', 'studio photography of goldfish in a bowl, black background', or 'studio photography of cake, fruit, lava'. Enter these prompts one at a time and see what results you get.
Notes:
- Be creative with your prompts. The more specific and descriptive, the better the results.
- You can adjust the prompts based on the initial results to refine the output.
Step 4: Iterate on Interesting Generations
If you get an interesting generation that sparks new ideas, download that image from Midjourney. Then, go back to the 'Edit' tab, upload this new image, and continue experimenting with different prompts. For example, if you get a 'drippy' effect, you might try to generate 'hanging icicles' or 'swirly frosting' to build on that theme.
Notes:
- Midjourney tends to stick closely to the source composition, so starting with a new generation can help you explore different angles and effects.
- Save all interesting variations as you go, as they can be useful for future iterations.
Step 5: Use Personalization for Better Results
To enhance your logo illustrations, use Midjourney's personalization feature. Go to the 'Personalization' tab and click 'Start Teaching'. You'll need to rank at least 200 image pairs to generate your personalization code. Once set up, apply this personalization to your prompts to see improved results without additional prompting.
Notes:
- Personalization can significantly improve the quality and relevance of your generated images.
- Take your time to rank the image pairs accurately for the best personalization results.
Step 6: Finalize and Export Your Logo Variations
After experimenting and iterating, select the logo variations that best fit your needs. Download these final images from Midjourney. You can now use these logo illustrations for your no-code website builder project, such as Framer.
Notes:
- Consider creating a folder to organize your final logo variations for easy access.
- If needed, you can further edit these images in a graphic design tool before using them in your project.
Conclusion
In this tutorial, you learned how to transform a basic logo into creative illustrations using Midjourney. By uploading your logo, experimenting with retexture prompts, iterating on interesting generations, and applying personalization, you can generate unique logo variations suitable for a no-code website builder like Framer. As a next step, consider exploring more advanced Midjourney features or integrating these logo illustrations into your website design projects.
Premium Content
Unlock the full tutorial with premium access
- ✓
Unlock all premium tutorials
- ✓
Access exclusive resources and tools
- ✓
Get priority support from our team
What You'll Learn
- 1
Introduction to Logo Illustration with MidJourney
- 2
Uploading and Editing Images in MidJourney
- 3
Experimenting with Prompts in the Retexture Tab
- 4
Iterating on Generated Images
- 5
Applying Personalization in MidJourney
- 6
Case Study: Logo for Framer
- 7
Conclusion and Next Steps
Prerequisites
- Basic understanding of the topic
- Familiarity with core concepts
Related Tools
Stay Updated
Subscribe to our newsletter for tutorials, industry insights, and expert workshop.